Troubleshooting
15 minute read
Common scenarios that require troubleshooting are listed below.
If you don’t see your specific scenario, the most common troubleshooting steps are checking the Agent status, the Agent logs, or the ConfigMaps settings, or restarting the Agent as described in Common troubleshooting steps below.
Installation
- Health check failed with a
Failed to create StormForge clientmessage: What should I do? - The Agent installation failed. What can I check?
- The Applier installation failed. What can I check?
Workloads and recommendations
- I don’t see the workloads (or namespaces) that I expect on the dashboard. What can I check?
- How do I grant RBAC permissions on a patch target?
- I didn’t get a recommendation for a workload. What can I check?
- Recommendations don’t seem right based on the CPU/memory utilization. What can I do?
- My cluster is disconnected. What can I check?
Errors and warnings
Failed to send batch, retryingmessage: What should I do?- Workload status indicates one of the following error (
 ) or unsupported (
 ) messages - what should I do?
- Recommender Failure
- Scaled to Zero
- Missing Data
- Expired
- Applier Failure
- Job doesn’t run long enough to make a recommendation
- Corrupt data detected for container
- Oscillating Replicas
- Target Utilization Max
Note: To see all workload statuses, see this reference topic.
Common troubleshooting steps
Most troubleshooting involves the checks listed below.
Agent troubleshooting
View high-level information such as Agent status and cluster connection status
helm test stormforge-agent -n stormforge-system --logs
Examine the output to determine:
- Whether the cluster name is valid
- Whether the application can connect to the
api.stormforge.ioendpoint - Whether the Agent is able to start
Check whether the Agent is running
kubectl get pods -n stormforge-system -l app.kubernetes.io/component=agent
View the Agent logs
These logs show output and errors related to the Agent Deployments.
-
If the Agent won’t start (for example, connectivity issues when using a proxy), check the init container status:
kubectl logs -n stormforge-system -l app.kubernetes.io/component=agent -c init --tail=-1 -
If the Agent is running:
kubectl logs -n stormforge-system -l app.kubernetes.io/component=agent --tail=-1
Describe the Agent Pod and Events
kubectl describe pod -n stormforge-system -l app.kubernetes.io/component=agent
Examine the output:
- Check the pod status, state and reason, conditions, and events.
- In the
.containersspec, check the arguments, state, liveness, and readiness.
View the ConfigMaps settings
kubectl get configmaps -n stormforge-system -l app.kubernetes.io/name=stormforge-agent -o yaml
Scan the relevant ConfigMaps for any unusual or unexpected settings. To make changes, identify the correct Helm values needed to change the ConfigMap and set them by running helm upgrade. If you make changes by editing the ConfigMaps directly, those manual edits will be overwritten on upgrade.
Restart the Agent
In some scenarios, restarting the Agent solves the problem. Remember that this will result in a few moments of downtime while new pods scale up:
kubectl rollout restart -n stormforge-system deployment.apps/stormforge-agent-workload-controller
To check the status of the restart, run:
kubectl rollout status deployment -n stormforge-system stormforge-agent-workload-controller -w
A successful restart generates this message:
deployment "stormforge-agent-workload-controller" successfully rolled out
Applier troubleshooting
View the Applier logs
These logs contain output and errors related to the Applier Deployment.
kubectl logs -n stormforge-system -l component=applier --tail=-1
Describe the Applier Pod and Events
kubectl describe pod -n stormforge-system -l component=applier
Examine the output:
- Check the pod status, state and reason, conditions, and events.
- In the
.containersspec, check the arguments, state, liveness, and readiness.
Related topics
Common questions
Installation: Health check failed with a Failed to create StormForge client message
This message can occur when installing either the Agent or Applier, and it indicates a connectivity problem between your environment and the StormForge environment. For example, a proxy or a firewall that isn’t configured correctly can cause timeout, proxy, and TLS issues.
Start by checking the connectivity to the StormForge endpoints:
kubectl -n stormforge-system run stormforge-check-connect --attach --rm --restart Never --quiet \
    --image registry.stormforge.io/library/stormforge-cli -- check connect
If any endpoint status in the output is not OK, try the following steps:
-
Run the following
busyboxandwgetcommands to check for a network issue such as a problematic network policy, firewall, or outgress controller:kubectl -n stormforge-system run -i --tty busybox --image=busybox --restart=Never -- shAt the busybox command prompt, enter:
wget https://api.stormforge.ioIn this example, although it is counterintuitive, the
404error indicates connectivity to StormForge servers:% kubectl -n stormforge-system run -i --tty busybox --image=busybox --restart=Never -- sh If you don't see a command prompt, try pressing enter. / # / # wget https://api.stormforge.io Connecting to api.stormforge.io (XX.XXX.XXX.XXX:443) wget: note: TLS certificate validation not implemented wget: server returned error: HTTP/1.1 404 Not FoundType
exitto exit busybox and then delete the pod:kubectl delete pod busybox -n stormforge-system -
If the
busyboxandwgetcommands above do not return a404error, run the following command, which uses anetshootimage to determine which network hop is dropping the connection.
Note: You must be connected to the cluster with admin rights and the pod must run in privileged mode (.spec.privileged: true):kubectl -n stormforge-system run tmp-shell --rm -i --tty --image nicolaka/netshootAt the
[tmp-shell]prompt, enter:tcptraceroute api.stormforge.io 443The following example illustrates end-to-end connectivity. If you are troubleshooting, you might see
* * *indefinitely at a particular hop.% kubectl -n stormforge-system run tmp-shell --rm -i --tty --image nicolaka/netshoot tmp-shell ~ tcptraceroute api.stormforge.io 443 Selected device dev0, address 192.168.0.3, port 33305 for outgoing packets Tracing the path to api.stormforge.io (198.51.100.1) on TCP port 443 (https), 30 hops max 1 192.168.0.1 0.056 ms 0.052 ms 0.048 ms 2 192.168.0.2 0.274 ms 0.215 ms 0.205 ms 3 * * * 4 ec2-198-51-100-1.compute-1.amazonaws.com (198.51.100.1) 0.787 ms 0.678 ms 0.542 ms 5 ec2-198-51-100-1.compute-1.amazonaws.com (198.51.100.1) 1.520 ms 0.832 ms 0.817 ms 6 ec2-198-51-100-1.compute-1.amazonaws.com (198.51.100.1) [open] 1.288 ms 2.021 ms 2.333 ms
The Agent installation failed. What can I check?
If the Agent didn’t install correctly, you might not be able to:
- Log in to https://app.stormforge.io
- View your workloads after logging in to https://app.stormforge.io
Here are a few things you can check:
-
Run the built-in Helm chart tests.
Check the last line of the output — if the test fails, you’ll see something similar to this message (with the error messages shown immediately before it):Error: 2 errors occurred: * pod stormforge-agent-healthcheck failed
The Applier installation failed. What can I check?
The Applier uses the secret provided by the Agent - check for the secret’s existence by running:
kubectl get deployment,secret -n stormforge-system
Check the output for the following item:
NAME                      TYPE     DATA   AGE
secret/stormforge-agent-auth   Opaque   5      31d
If the secret is missing, reinstall the Agent and then try installing the Applier again.
Workloads and recommendations
I don’t see the workloads (or namespaces) that I expect on the dashboard. What can I check?
Reasons why you might not see some workloads or namespaces include:
-
The namespace exists but it is empty - no pods, no built-in types.
-
The namespace contains only batch jobs (which are not supported) or pods without an owner reference (this is rare).
-
The namespace has no workloads in a healthy state: for example, a DaemonSet isn’t fully operational (which occurs when not all are healthy).
-
The namespace allowNamespaces or denyNamespaces Helm chart values constrain which namespaces to optimize.
Note: By default, workloads in the
kube-systemandopenshift-*namespaces are in the denyNamespaces list, and you won’t see these namespaces or their workloads on the dashboard.
There are a few things you can check: pods on the cluster, the Agent logs, and the allow/deny namespaces lists.
Get a list of all running pods on the cluster
kubectl get all -A
You might choose to modify this command or add other arguments, based on your familiarity with Kubernetes.
In the output:
- In the NAME column, look at the pod list (
pod/POD_NAMErows) and make sure thestormforge-agent-workload-controller-POD_SUFFIXpod and your application pods in other namespaces are running. - In the NAME column, look for
batch.apps: If it exists, make sure that the corresponding namespace contains other Kubernetes types (deployment.apps, replicaset.apps, daemonset.apps). - For each pod whose STATUS column that has a status of RUNNING, check the READY column: Make sure all the nodes are ready. For example, 7/7 means the workload is healthy (all 7 pods are running); 3/7 is unhealthy.
Check whether there are any workloads on the cluster
Run kubectl get deployments (include the -n NAMESPACE argument if you’re not checking the default namespace). If there are no deployments listed in the output, Optimize Live won’t collect any metrics.
- If you need a sample workload, you can download the Optimize Live sample application, which installs one workload on your cluster. From a command line, run:
Learn more about the sample application in this guide.
helm install optlive-showcase-app oci://registry.stormforge.io/examples/optlive-showcase-app
Check the Agent logs
- Get the Agent logs as described above.
- Scan the output for errors and any unusual or unexpected settings.
Check whether the allowList or denyList constraints are too restrictive
- Get the Optimize Live ConfigMap as described above.
- Find
workload-agent.ymlin the output, and look for the allowNamespaces or denyNamespaces argument.- If either list is present and doesn’t match what you expect, adjust it as needed. If both are present, the allowList has precedence and the denyList is ignored.
- If neither list is included in this spec, then neither list has been set, and something else is causing the problem.
How do I grant RBAC permissions on a patch target?
To apply or export the recommended workload settings, Optimize Live must:
- Support the patch target type.
- Have RBAC access permissions on the patch target.
When these permissions are missing, you’ll see a message similar to this:
please grant rbac access permissions on name/namespace: %s/%s, kind: %s, apiversion: %s
To grant RBAC access permissions:
-
Find the stormforge-agent
values.yamlfile from the Helm chart that was used to install the StormForge Agent.- If you don’t have the file:
-
Download the chart:
helm show values oci://registry.stormforge.io/library/stormforge-agentIf you use a proxy server or private container registry, follow the steps in Install the StormForge Agent - advanced scenarios.
-
Copy the
.rbacsection into a new file namedrbac-update.yaml. Proceed to the next step.
-
- If you don’t have the file:
-
In the
rbac.additionalsection, add a.apiGroupssection that includes the resources listed in the message.-
Remember to replace API_VERSION and KIND with the values from the
please grant rbac access permissions ...message.rbac: additional: - apiGroups: - API_VERSION resources: - KIND verbs: - get - list - watch
-
-
Apply the changes by running one of the following commands:
-
If you edited the
values.yamlfile, run:helm upgrade --values.yaml -
If you created a separate file named
rbac-update.yaml, run:helm upgrade --values.yaml -f rbac-update.yaml
-
I didn’t get a recommendation for a workload. What can I check?
Check the basics:
- Look for more information in a message in the Optimize Live banner.
- Check that the recommendation schedule is set to the frequency that you expect:
-
Click Workloads in left navigation and drill down to the workload.
-
Click Settings > Schedule and check the Recommendation Schedule.
To change the schedule, set the
live.stormforge.io/scheduleannotation as described in the Schedule topic.
-
Check for scale-down events: You won’t get a recommendation if the workload scales down to 0 replicas for more than 75% of the time during a 7-day period. Sufficient metrics aren’t available when a workload scales down for this much time.
Recommendations don’t seem right based on the CPU/memory utilization. What can I do?
Optimize Live responds to changes in a workload’s profile (CPU/memory utilization) and generates recommendations based on those changes and recent data.
If a planned change to a workload dramatically alters the profile, StormForge Support can help you restart the workload’s learning period (initial observation period). Optimize Live will collect fresh metrics and generate new preliminary recommendations, which you can apply on demand, for the duration of the learning period.
When the learning period is complete, Optimize Live generates recommendations that can be applied automatically if auto-deploy is enabled, or you can apply them on demand.
Related information:
My cluster is disconnected. What can I check?
If Optimize Live doesn’t get a response from a cluster after about one hour, it marks the cluster as disconnected ( ). The data shown is the last view that Optimize Live has of the data.
If you believe the cluster should be connected, check the Agent status and cluster connection status. Restart the Agent if needed.
Errors and warnings
Failed to send batch, retrying
Post "https://in.stormforge.io/prometheus/write": oauth2: "too_many_attempts" We have detected suspicious login behavior and further attempts will be blocked. Please contact the administrator.
If enough incorrect client_ID/client_secret combinations originate from one IP address, any further attempts to connect to Optimize Live are blocked.
Troubleshooting steps:
-
Determine which authentication setup you’re using in your estate. An administrator typically makes this decision, usually before installing Optimize Live on an initial cluster.
- One clientID/clientSecret pair used by all clusters
- One clientID/clientSecret pair per cluster
-
On each cluster, locate your access credentials file (the
.yamlfile that contains your clientID and clientSecret). This file was created when you either:- Added a cluster by clicking Add Cluster in the Optimize Live UI
- Ran
stormforge auth create CREDENTIAL_NAME > CREDENTIAL_FILEfrom the command line before you installed the StormForge Agent
Errors are grouped below by the error type shown when you hover over an error status in a workload list. Example:
Recommender Failure
Failed to generate recommendation (1000)
This error can occur for different reasons. Typically, contacting support is the best action to take, but you can also try one of the following:
- Try to generate a new recommendation by:
-
Clicking Regenerate on the workload details page and then applying the recommendation.
-
Running
stormforge create recommendations [flags]. Append the--autodeployflag to apply it immediately, or runstormforge apply --recommendation RECOMMENDATION_NAME [flags]to apply it manually.Tip: To get the 10-digit recommendation name, run
stormforge get recommendations [flags].
Example (replace placeholders with your cluster, namespace, and workload names):stormforge get recommendations --cluster CLUSTER_NAME --namespace NAMESPACE_NAME --name WORKLOAD_NAME –state Generated -o yaml
-
- Wait for the next scheduled recommendation.
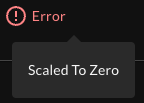
Scaled to Zero
No recommendation is generated when a workload scales to zero for too long.
Scaling down errors include:
The workload has been scaled to zero for too long.We've detected that this workload was scaled to zero in the last 7 days.Workload has been scaled to zero for more than 75% of the time over the last 7 days.
If the scaling down is unexpected, investigate the workload using kubectl commands.
Missing Data
No recommendation was generated because data is missing or is stale. When this happens, you’ll see one of the following errors:
-
We don't have any recent data for this workload - the available data is more than 20 minutes old. -
Data not found for cpu_usage. -
Data not found for requests. -
No containers metrics observed for this workload in the last 10 minutes.Try these standard Optimize Live troubleshooting steps:
- If the cluster is disconnected (), check the Agent status and cluster connection status.
- Check whether the Agent is running.
- View the Agent logs.
- Describe the Pod and Events for the Agent.
- If the cluster is disconnected (
Expired
The recommendation was not computed in a timely manner.
You can either wait for the next recommendation to be generated or generate a new one by:
- Clicking Regenerate on the workload details page and then applying the recommendation.
- Running stormforge create recommendations [flags]. Append the --autodeploy flag to apply it immediately, or run stormforge apply --recommendation RECOMMENDATION_NAME [flags] to apply it manually.
Applier Failure
If a workload doesn’t restart or function as expected after a recommendation is applied, the Optimize Live Applier rolls back the workload to its last known good state and logs one of the following messages in the Applier logs.
-
applied patch but timed out waiting for workload to become ready
rolled back to previous state not waiting for workload to become ready
workload was unhealthy prior to patchThe workload wasn’t healthy even before applying any changes, and you should investigate the workload directly.
Start by describing the pods relating to the workload resource and examine the Events section for clues.
kubectl describe pod NAMEYou can learn more about troubleshooting common issues with Kubernetes resources in the Kubernetes docs.
-
applied patch but timed out waiting for workload to become ready
rolled back to previous state workload returned to ready
or
applied patch but timed out waiting for workload to become ready rolled back to previous state timed out waiting for pods to be ready
While rollback is sometimes a desirable safety feature to have enabled, at scale and in large environments these errors often occur when the Applier’s monitoring period of 5min isn’t long enough for workloads to become Ready. The Applier determines that the change is a failure and rolls the workload back to the previous state.If this error happens often, disable the rollback feature.
Disable rollback
- Add the following code to a
.yamlfile, for example,applier-values.yaml.# applier-values.yaml extraEnvVars: - name: STORMFORGE_SKIP_ROLLBACK value: "true" - Upgrade the applier using the new values:
helm upgrade stormforge-applier oci://registry.stormforge.io/library/stormforge-applier \
  -n stormforge-system \
  -f applier-values.yaml
- Add the following code to a
Unsupported workloads
Workloads whose status is Unsupported () are configured in such a way that Optimize Live does not generate recommendations for them. The following messages shown for unsupported workloads are informational only, and typically, no action is required.
Job doesn’t run long enough to make a recommendation
A CronJob (or any short-duration Job) must typically run for at least 10 continuous minutes in order for Optimize Live to generate a recommendation. In some scenarios, 5-10 minutes is sufficient to generate a recommendation, depending on the frequency of the Job.
If the Job does not provide enough metrics within 5-10 minutes, Optimize Live labels the workload as Unsupported.
Optimize Live does not generate recommendations for Jobs that run for less than 5 minutes.
Corrupt data detected for container
No recommendation was generated because some of the metrics data StormForge has collected exhibit signs of corruption that make the metrics data unusable, such as metrics showing impossibly high CPU or memory usage. If you see workloads with this Unsupported reason, please contact Support.
Oscillating replicas
No recommendation was generated because the HPA oscillates between min and max replicas. If this is unexpected, investigate the workload. Increasing the max replicas can sometimes eliminate the oscillation, enabling Optimize Live to generate recommendations.
Target utilization max
No recommendation was generated because the HPA target.averageUtilization is set to greater than or equal to 100.